By Guest Contributor, Digital Photography School – August 23, 2012 at 11:12AM
A guest post by John Davenport
Photography in general is easy – right? You pick up your camera, point it in the direction of what interests you, and depress the shutter button. However, there are many levels of photography, and I’m sure many of you are aware of the basics.
Today I’m going to focus on something a bit more advanced, photographing the star filled sky, also known as astrophotography.

For astrophotography you will be delving a bit deeper into the use of some of the manual controls of your camera like shutter speed, aperture, and ISO control. I also highly recommend shooting in RAW for night photography, as it will allow more control when editing the final image. If you’re not sure what RAW is and why it is important I wrote a bit about RAW photography here.
Let’s Start With What You’ll Need
- Tripod – We’re going to be dealing with exposures in the tens of seconds and I don’t care who you are, you’re going to need something to stabilize your camera.
- A Camera With Manual Controls – Manual control of your ISO and shutter speed are going to be essential for photographing the stars.
- A Wide Aperture Lens – You’ll need a lot of light and f/2.8 seems to be the butter zone for astrophotography. Combine this with an ultra-wide lens and depth of field won’t be a problem.
With these three pieces of gear you’ll be off to a great start, but of course, there’s a lot more out there that you could potentially add down the line, which I’m sure you can discuss in the comments below.
Location, Location, Location
Now, it’s not enough to just get all the gear, you need to find the right places to photograph the night sky as well. Light pollution is a serious problem for astrophotography and if you’re anywhere near a large city you’re going to have to travel at least an hour to get away from the lights.
I live just outside of Boston MA and am pretty much locked into one of the most light polluted areas of the United States – southern New England.
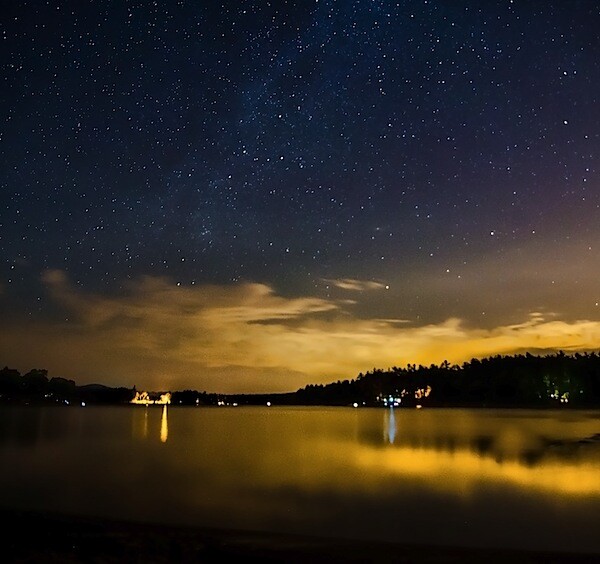
However, as seen in this image below, even a town of only about 30,000 people and over ten miles away can still result in some obstructive light pollution.

On top of finding the right location on Earth, you’ll want to have some idea of the location of various stars and constellations for your photography. I use an app called Starwalk for my iPhone to track these down as well as locating the core of the Milky Way, which can be amazing when photographed.
The Basic Set-up
When photographing these tiny pinholes of light you will need as much light to hit your sensor as possible. Therefore it’s important to use combination of high ISO, wide apertures, and long shutter speeds.
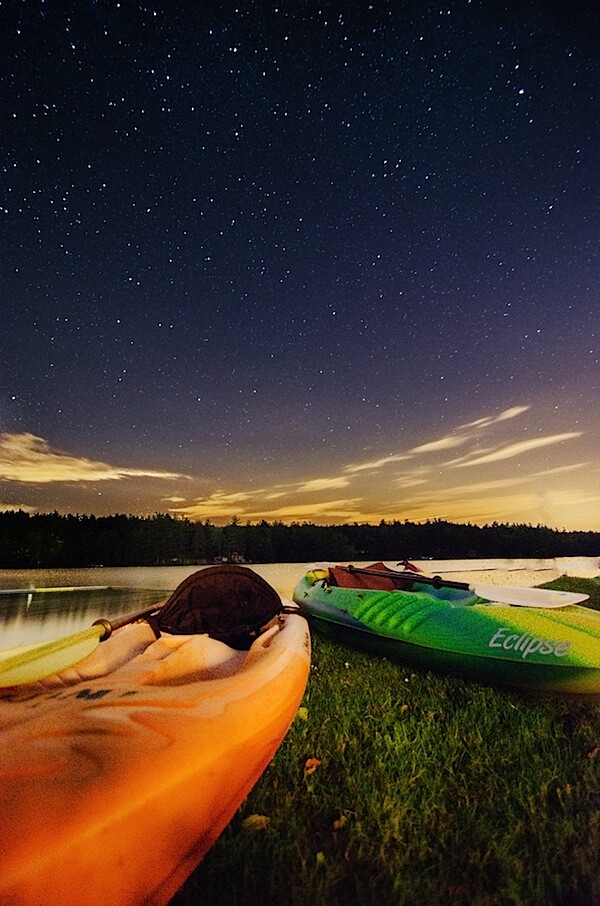
For the Kayaks Under the Stars photo above I used an ISO of 1250 an aperture of f/2.8 and an exposure of 30 seconds. As you’ll notice in the bottom right of the photograph there’s a bit of light pollution from a city about 30 minutes away.
One thing to do to try and minimize the light pollution is to find out where it is in a timely manner. To do this I typically will fire off successive shots all around the horizon using an absurdly high ISO (typically the highest my camera will go) simply to limit the time it takes for each shot to expose. These shots won’t be used in the final process, but they are valuable in letting me know which parts of the horizon are off-limits.
As far as exposure time goes, it’s better to keep it as short as possible, otherwise you’ll end up with movement in your stars as the Earth rotates. As an example, my kayak photograph was shot at 30 seconds, which was actually a bit long and if you look closely you can see some movement in the stars.
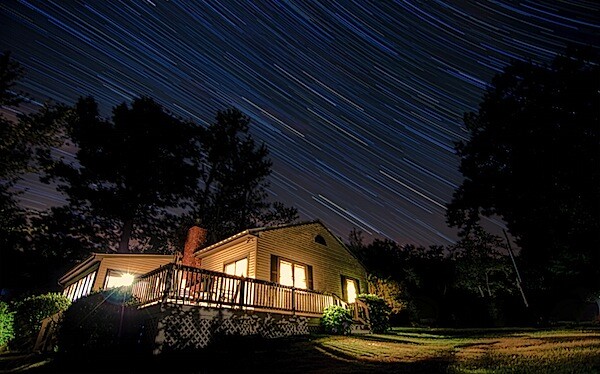
Now, don’t get me wrong, this can be an extremely cool style of photography in and of itself, referred to most often as creating star-trails like this shot below.

There’s a great post here on dPS about shooting star-trails, which you should check out for more information if you’re interesting in creating this kinds of photographs.
Processing the Photo
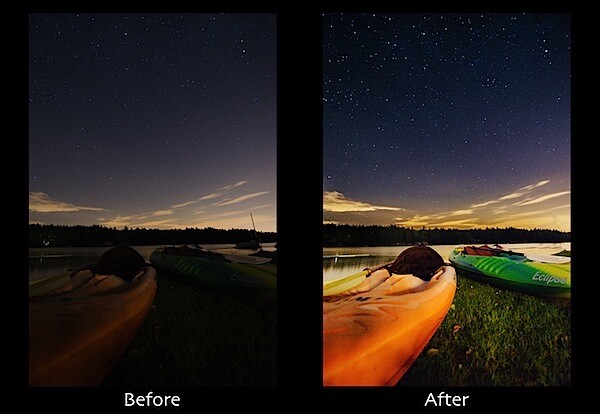
Processing these night sky photographs can be a bit intimidating, as at first they won’t look like much. As I mentioned above, I’d highly recommend shooting in the RAW format if your camera offers it, as it will allow you to do a lot more when it comes to this step.

For the shot featured at the top of this post I broke up the photograph into two zones to process, the sky and the foreground. I used LR4′s adjustment tool to selectively tweak each region until I was satisfied with the end result.
For more on how I edited this photograph watch this quick video walkthrough I made of the process.
John Davenport is an enthusiastic amateur photographer and blogger who shares daily photos on his site Phogropathy. You can also find him on Facebook and Twitter.
Post originally from: Digital Photography Tips.
Check out our more Photography Tips at Photography Tips for Beginners, Portrait Photography Tips and Wedding Photography Tips.